African Art: The Yoruba Crown
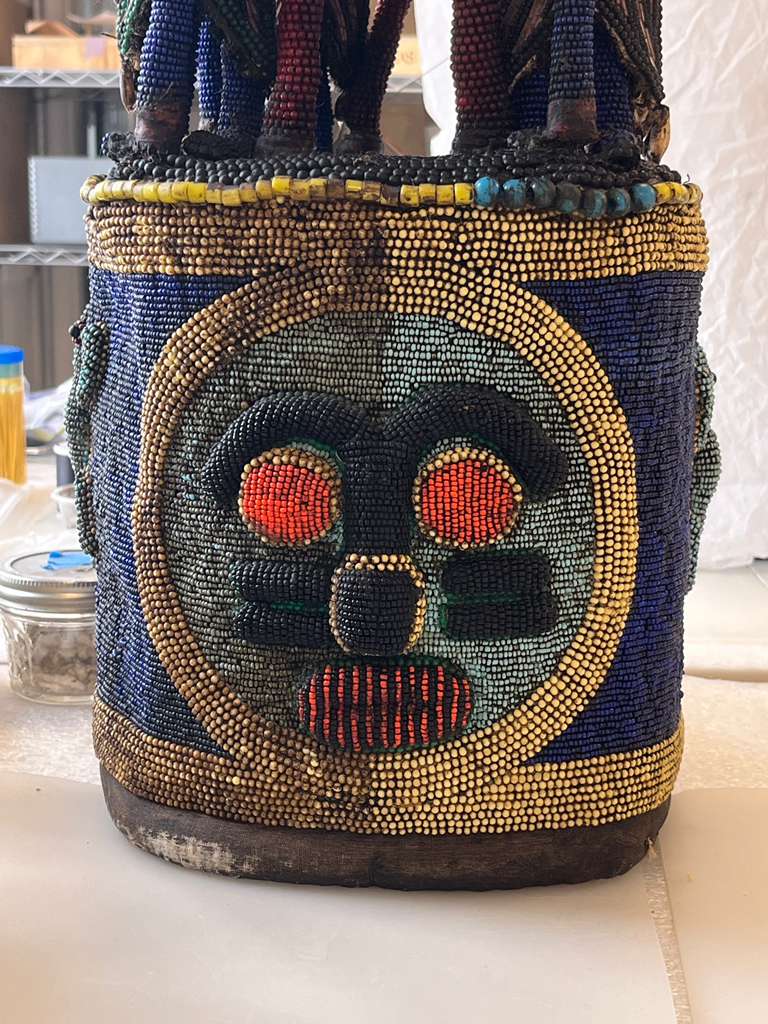
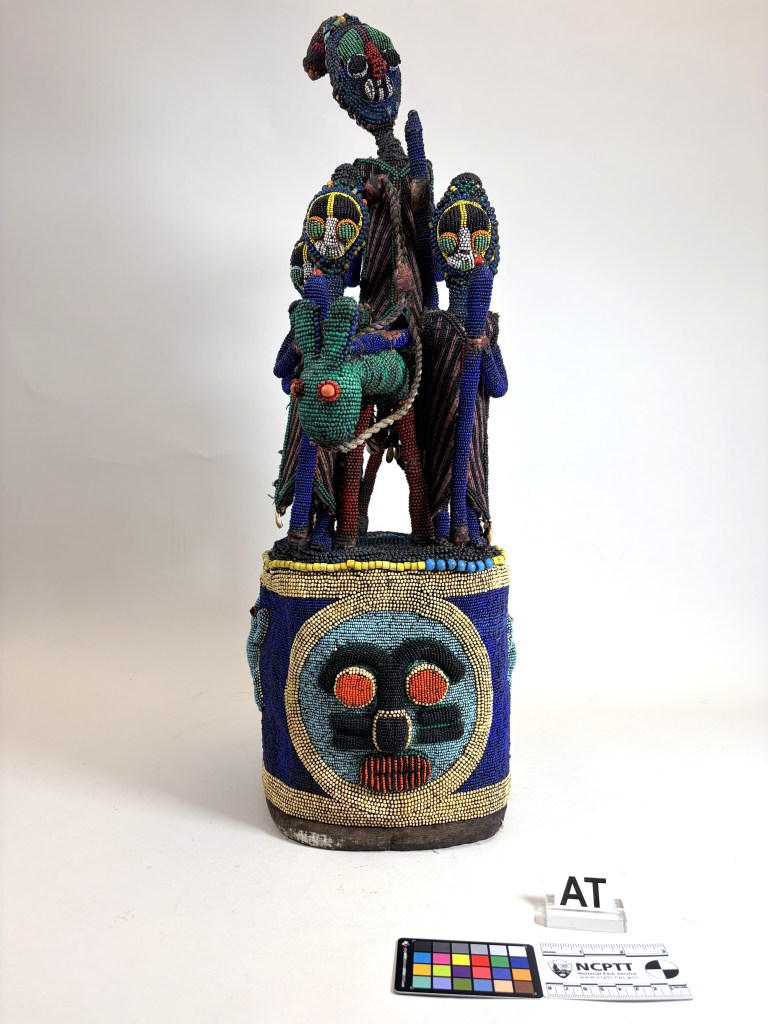
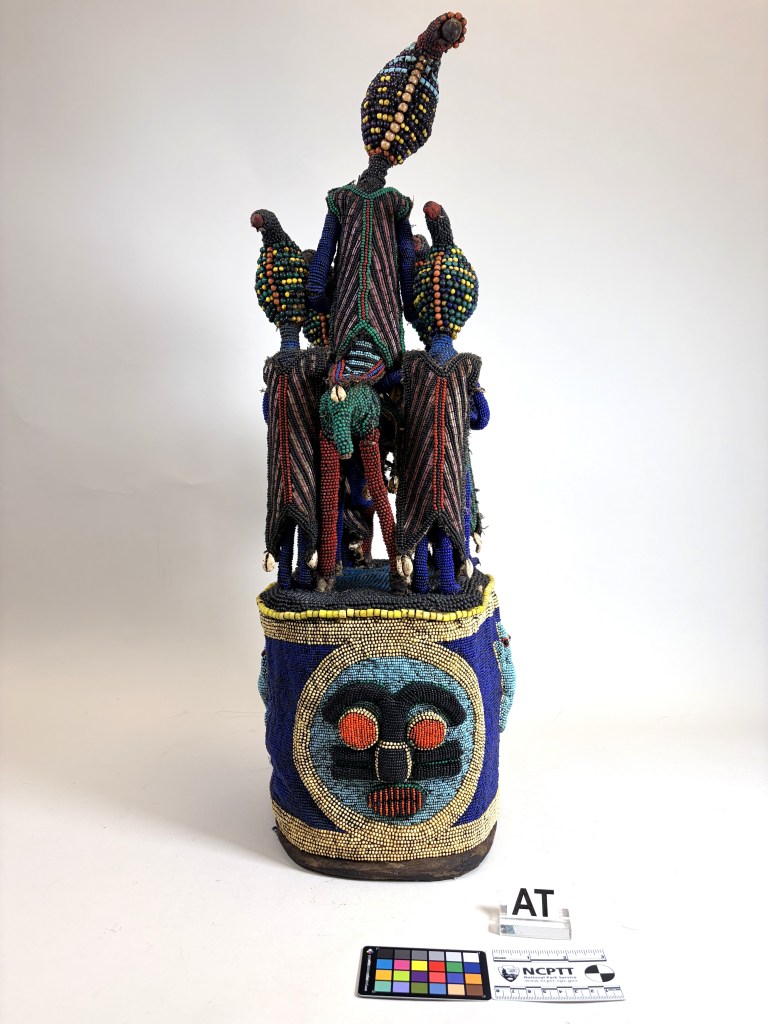
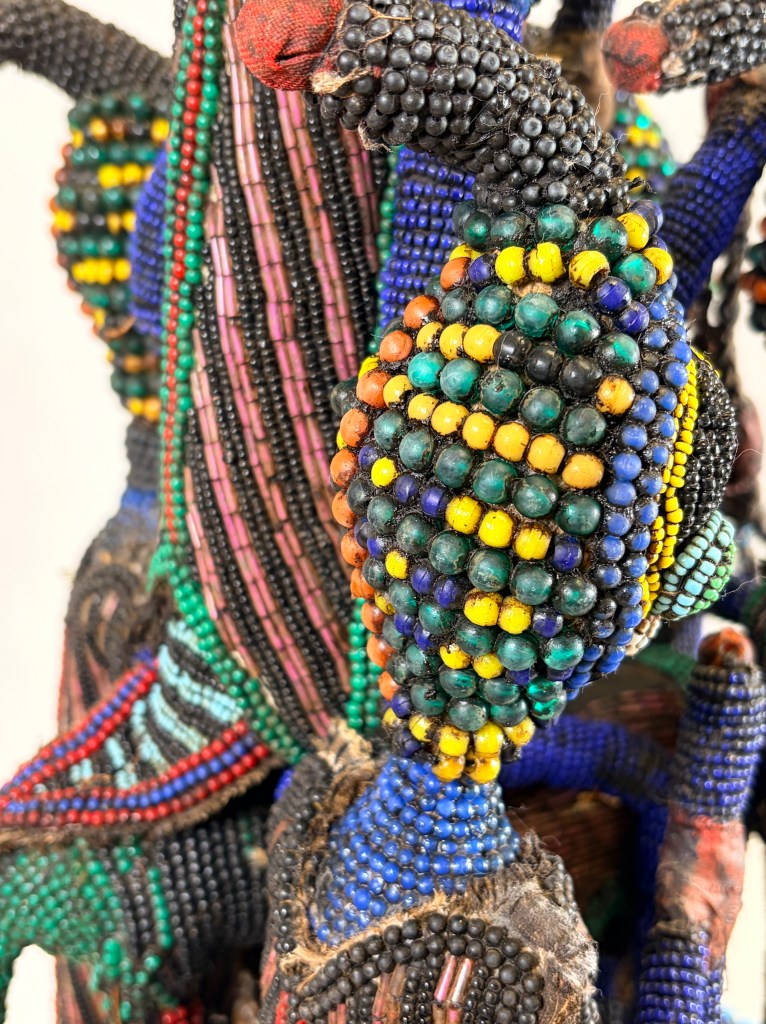
This page details the timeline and treatment of one of the two African artworks that I worked on this summer, the Yoruba crown. This crown is constructed from a carved wood and metal wire armature decorated and covered by a cotton textile and fully covered with glass and plastic seed beads and larger pony and tube beads. Glass and plastic beads are threaded and secured couched to the cotton and cover the entire work. The crown is decorated with five human figures, one mounted on the equine figure and four attendants, two on each side. Each attendant is attached to the equine figure by the arm. The animal is secured to the mounted central figure with roped fabric that connects the two. Cowrie shells are attached to the work with thread, and secured to the ends of the figure’s garments. The entire work is covered with a layer of brown dust/dirt. After speaking with the owner of the Dafco African Art Gallery, Joe Cobbinah, we were informed that this layer should be removed in a cleaning process and is not significant to the provenance of the piece. Cobbinah also informed us that this piece was likely used in a ceremony celebrating the coming of age of young women. The lower portion of the work is decorated, with the panels consisting of a face on the front and back and lizards on each side.
Treating the yoruba crown
CONDITION: The crown overall is in good condition and is for the most part structurally sound. The owner’s main concern for this work was the significant amount of surface debris and grime. Below, the condition of the piece has been broken up into structural and surface concerns.
Structure:
The center figure’s head is damaged. The internal wire armature of the central figure’s head appears to be pushed off center resulting in the head tilting to the proper right (PR) with surface cracking and loss of the thick resin-like coating on the beads at the neck. The outer strands of red beads circling the equine figure’s PL eye is partially detached, falling forward away from its original placement around the eye. Additional surface cracking can be seen in the neck area of the equine mount, and in the hats worn by the figures where the structure is curved in shape and is separated from the support of the head. Loose fibers and broken threads can also be seen in areas where the seams of bead fabric meet, such as at the top of the figure’s shoulders, around the transition from black to yellow beading in the middle of the work, and in many places around the equine figure.
Surface:
The crown has accumulated a great deal of dust and surface debris that has adhered to the dusty exterior of the headdress. In some areas like the top of the crown, the face of the equid and the head of the central figure, a layer of what may be adhesive, was applied to sections of the piece that displayed potential for bead loss/detachment. This material ranges in appearance from translucent to black. There is noticeable cracking of this adhesive layer where it has pulled away between the strands of beads.
BT Images (Before Treatment)
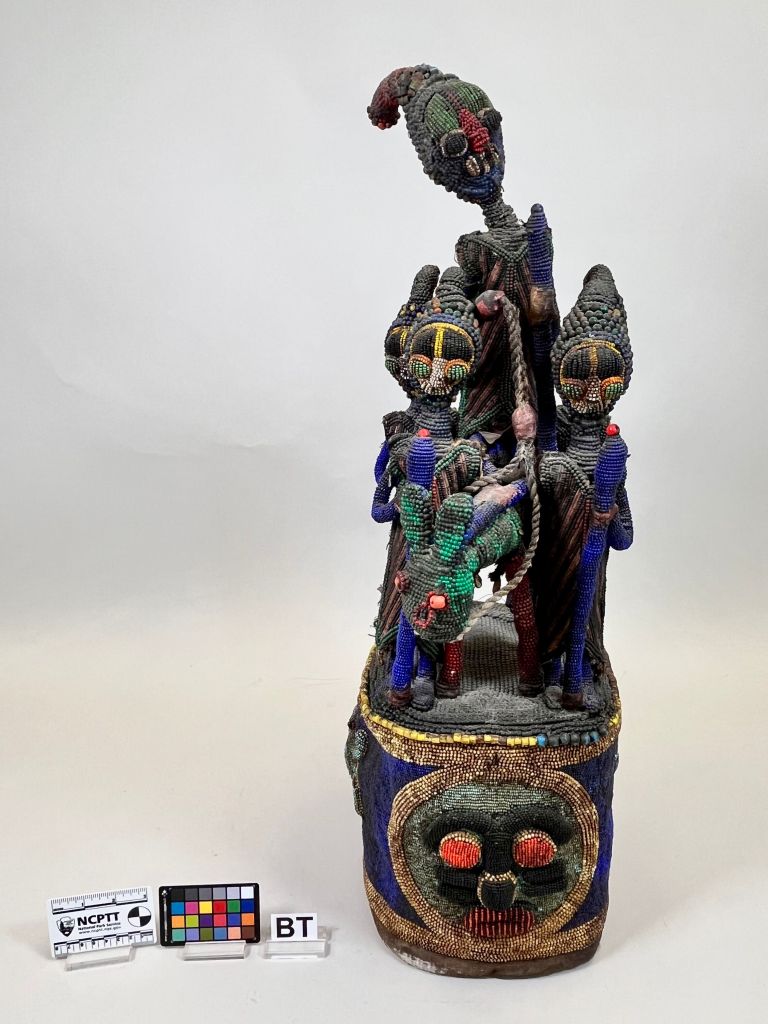
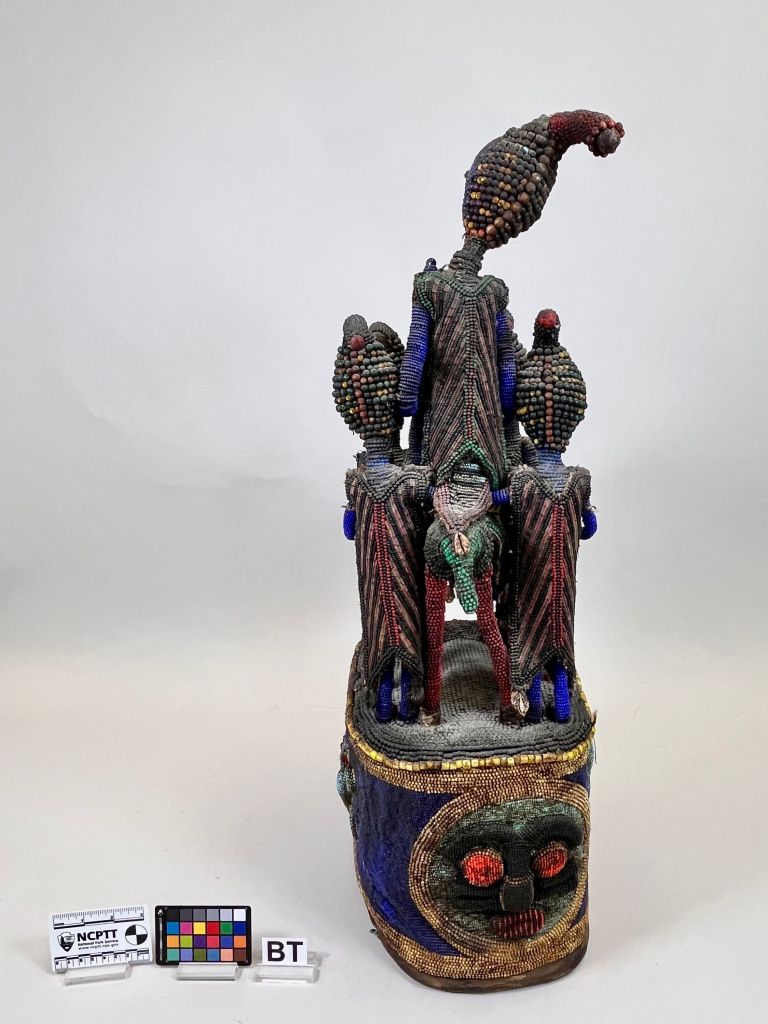
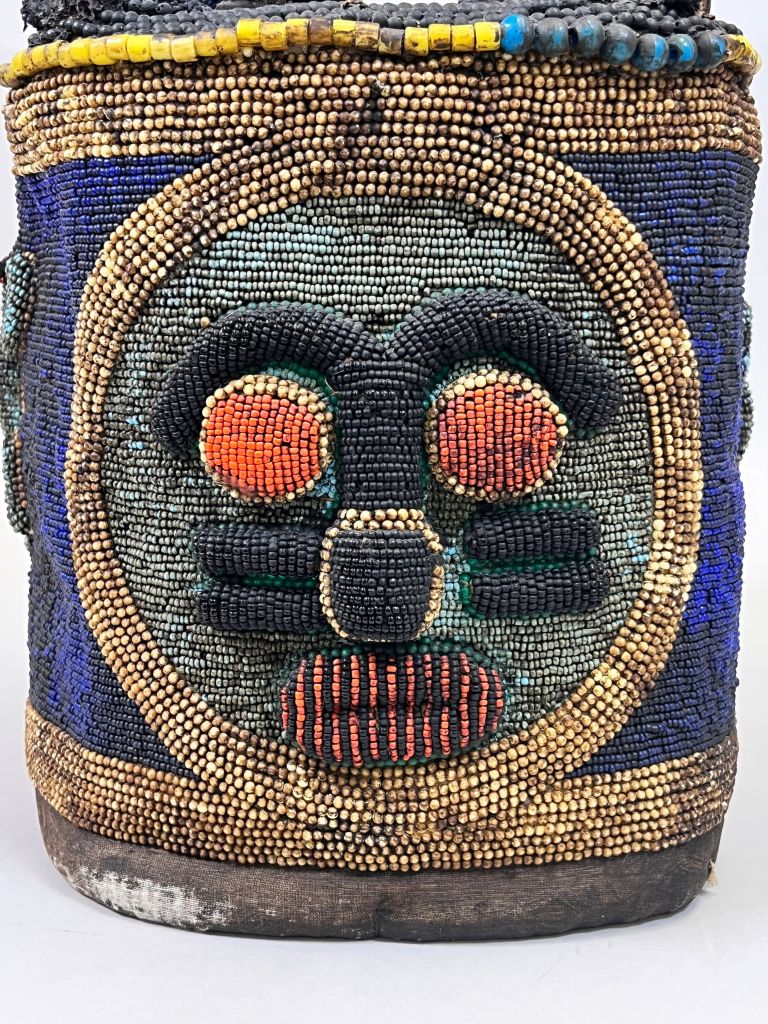
Proposed Treatment as written in final report
- Surface cleaning:
- Brush vacuum overall
- Mechanical removal of debris as necessary.
- Additional grime removal with the use of soot sponges and cosmetic sponges to remove the surface dust and debris without removing coating as appropriate.
- Minor toning of the cracked areas around the central figures neck if deemed appropriate,
- repairing/filling the surface c racking with the appropriate pigments.
After the initial surface cleaning was carried out, the piece was still covered in a caked on layer of grime. It was at this point that we spoke with the owner of the Dafco African Art Gallery, Joe Cobbinah to get a better understanding about the piece, as Cobbinah is originally from Ghana, and has a long career in showing and selling African Art. Coincidentally, his gallery is right down the hall from the studio, making it easy to set up a conversation and the opportunity for him to see the piece in person. After speaking with him about the piece, and speaking with the owner, it was decided that the next step would be to remove the layer of grime that remained, as it was not significant to the provenance of the piece.
To successfully remove the grime from this piece, I needed to carry out a series of solvent testing.
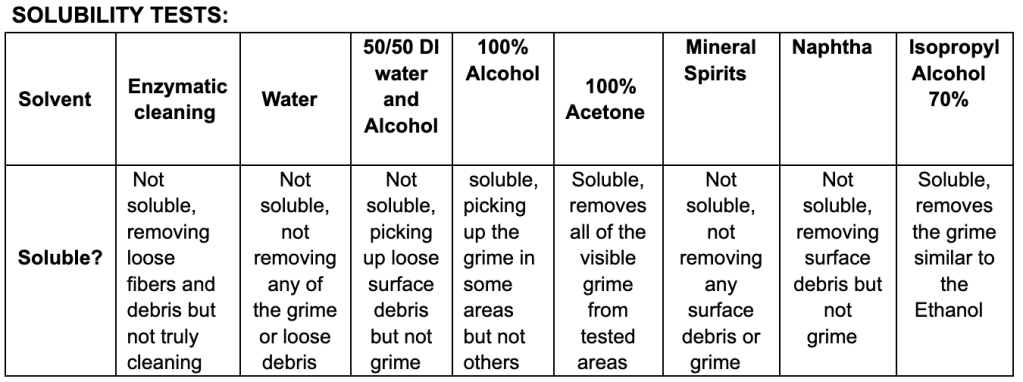
The table above shows the results of the solvent testing that I completed as it appears in the final report. This set of 8 solvents are pretty standard for solvent testing and in general are done from weakest to strongest solvent (Isopropyl Alcohol should be placed in between the 50/50 DI water and Alcohol and the 100% Alcohol). In this case, the goal is to choose the solvent that works in removing the grime efficiently (time is an important factor, but does not come before the safety of the piece), while also being the least noxious/harmful to work with. In this case the Isopropyl, Ethanol, and Acetone all worked in removing the grime, however we chose to use the Isopropyl because it was the least noxious of the three and was just as effective in terms of the amount of time it took to remove the grime.
I then spent several days re-cleaning the piece with a cotton swab dampened with Isopropyl Alcohol. This worked really well in removing the caked on surface grime, revealing the bead colors, while also leaving some of the grime in between the beads meaning that I wouldn’t over clean, it also gave the piece a bit of dimension. It was also during this process that we discovered that this pieces is covered in several different kinds of adhesive, presumably applied to the piece in an attempt to keep loose beads from detaching.
DT Images (During Treatment)
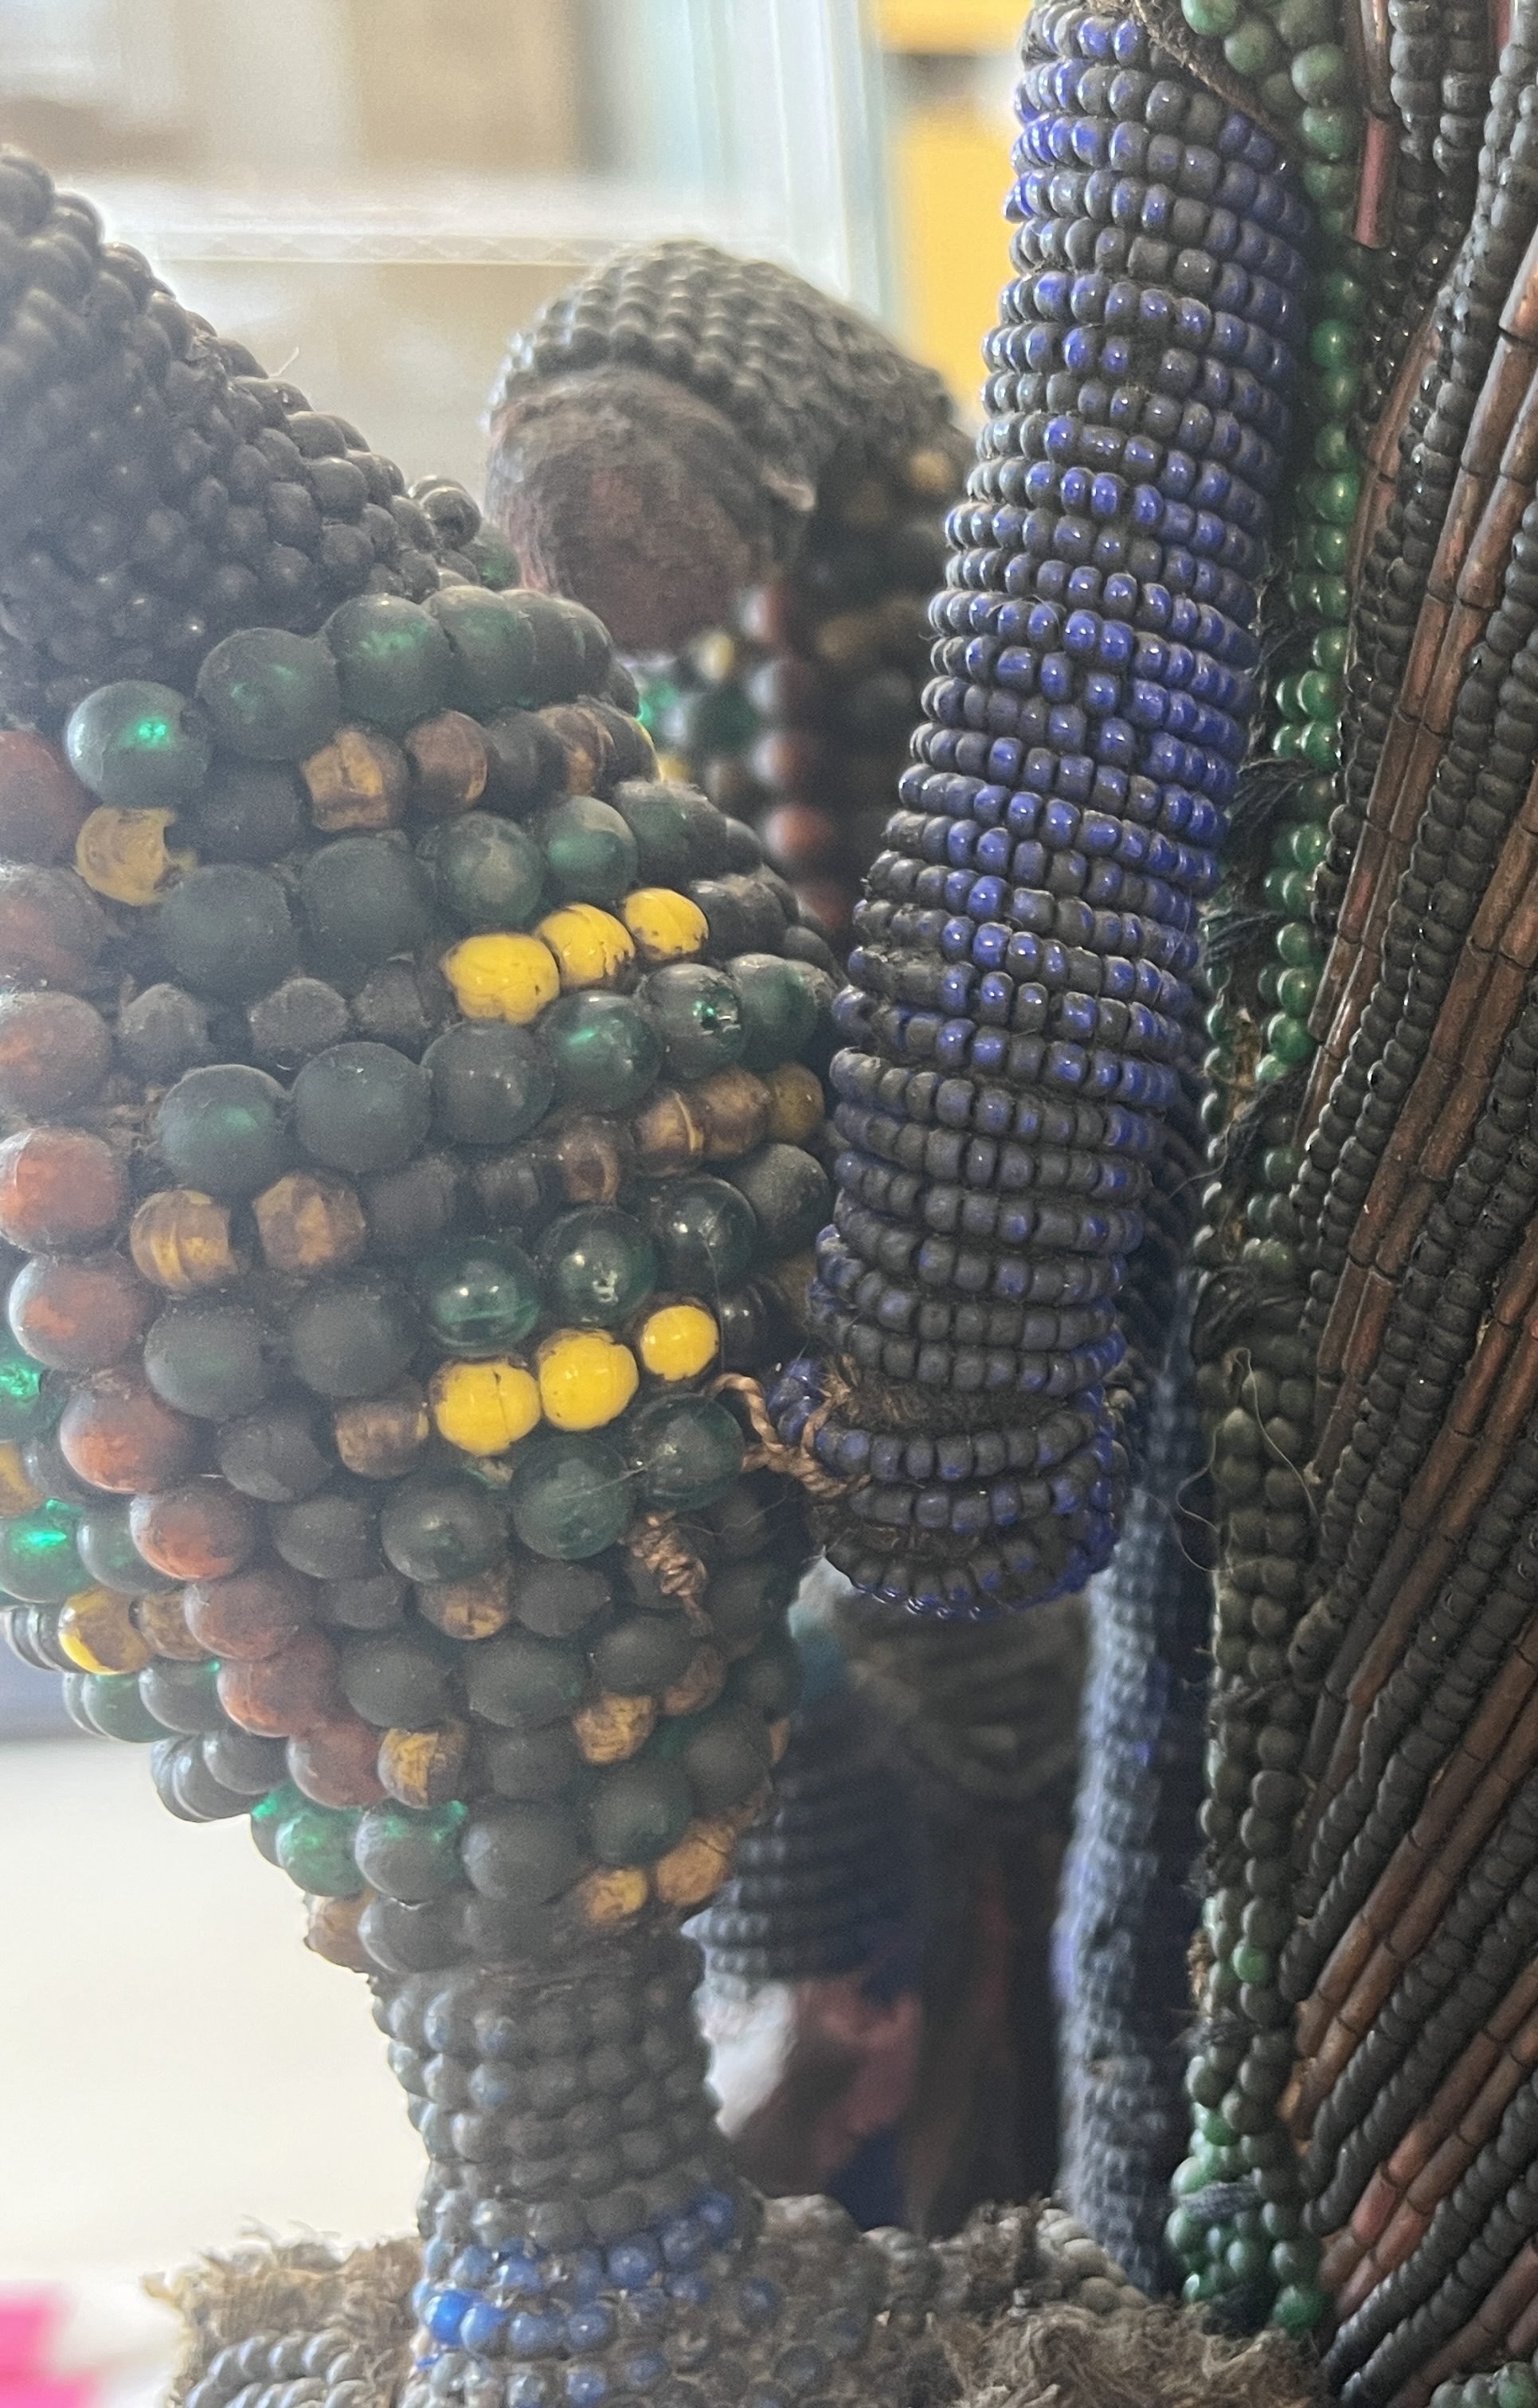
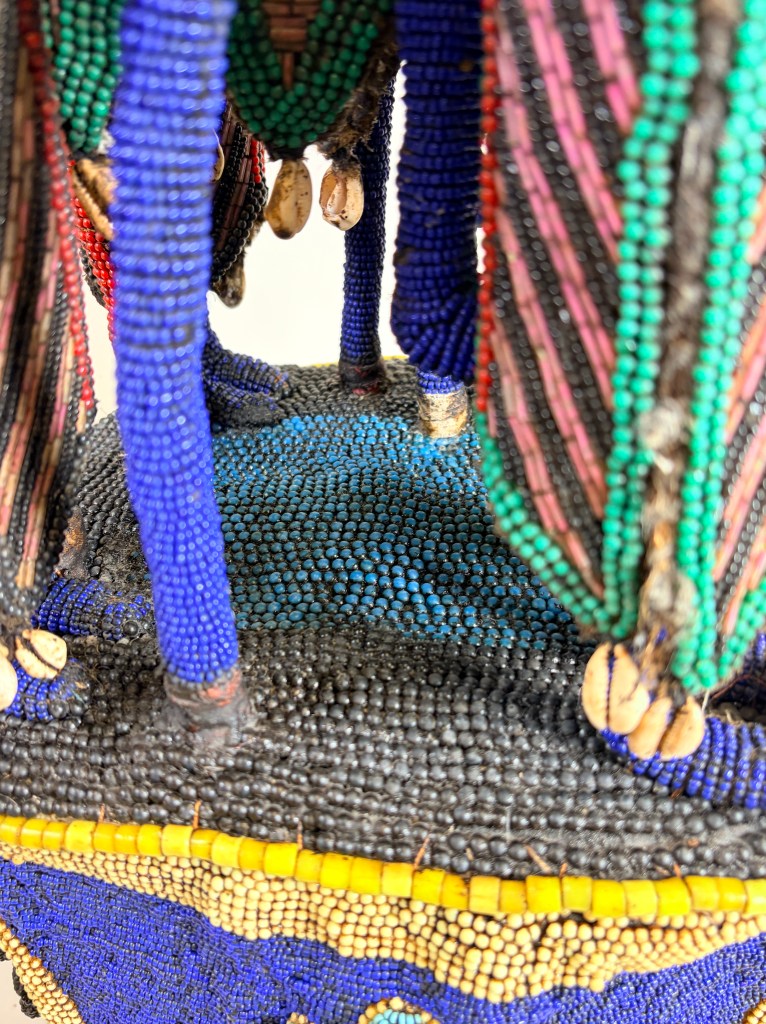
Once this was done, we decided to try going back in with acetone to see if we could get anymore of the grime up from the black beads that lined the top of the drum/base structure. Unfortunately, that test resulted in the beads aquiring a grey/white haze. After examining the haze, it was determined that the acetone had solubilized the adhesive on the surface of the bead, not the bead itself, without removing the adhesive.
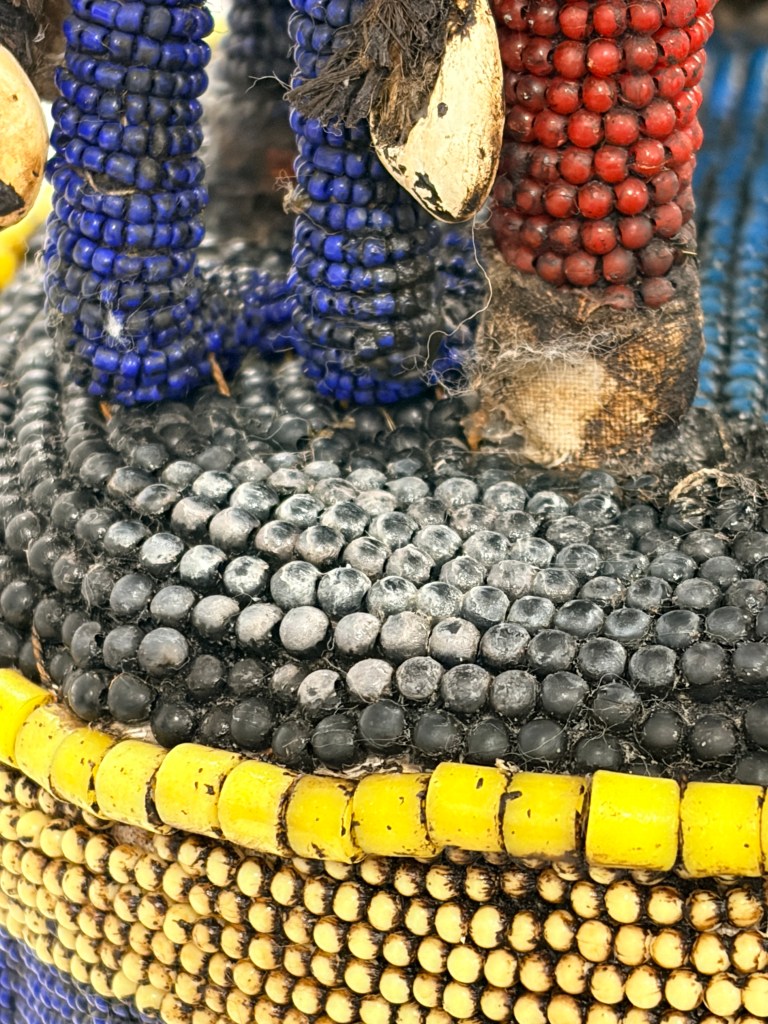
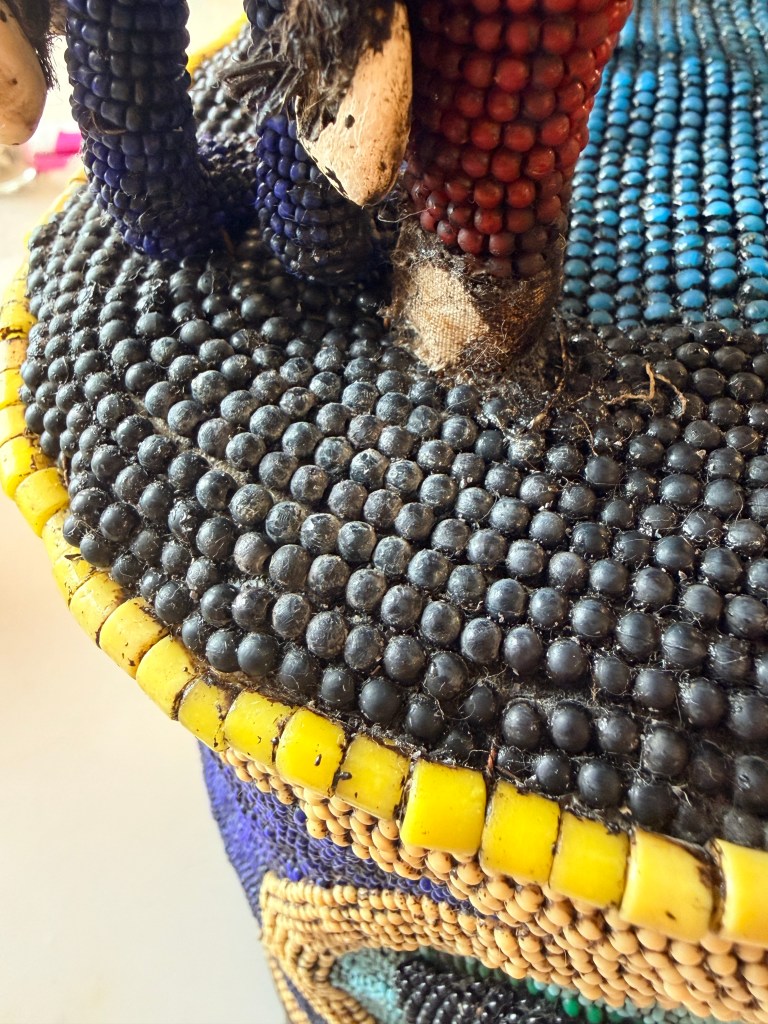
I will fully admit, that having this happen was terrifying, as when I initially saw this reaction I thought the bead was dissolving. But it also is a good example of sometimes things happen, and thankfully we were able to correct it. We initially tried to “go through” the adhesive with more acetone to see if we could wipe it away, but that proved to be unsuccessful. We then went in with a small scalpel blade to physically remove the haze by gently scrapping away at it. This worked pretty well, as the images above illustrate the before and after of this treatment. I then applied a few layers of renaissance wax to the area, letting it dry before I buffed it out, to give the area back a little bit of shine and helping it blend in with the surrounding bead work.
Before taking the after photos, I secured the loose bits of bead work back into place with Paraloid B-72, and tucked away all of the loose threads that were visible. It was also decided during the course of this treatment that the central figures head was structurally stable and did not show easy movement under applied pressure. Because it was not a risk for further movement or displacement, we did not attempt to reposition it.
AT Images (After Treatment)
 the summer shift